Home / Recipes / Checkered Paratha

Photo of Checkered Paratha by Akhilah Idhrees at BetterButter
601
4
4.0(1)
0

Checkered Paratha

Mar-01-2017
Akhilah Idhrees
20 minutes
Prep Time
5 minutes
Cook Time
7 People
Serves
Read Instructions Save For Later

ABOUT Checkered Paratha RECIPE

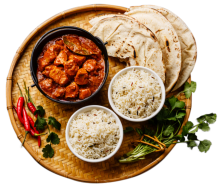
Acolorful and a nutritious bread

Recipe Tags

  • Veg
  • Medium
  • Kids Recipes
  • North Indian
  • Main Dish
  • Healthy

Ingredients Serving: 7

  1. A large handful of spinach leaves, stemmed
  2. A small handful coriander leaves
  3. 1-1/2cups whole wheat flour (add more or less as required)
  4. 2 green chillies
  5. salt to taste
  6. 1cup whole wheat flour (add more or less as required)
  7. 1small beetroot (washed, peeled , blanched and pureed)
  8. oil

Instructions

  1. Wash the Spinach, Coriander, green chillies.
  2. Chop them roughly and grind them to a fine paste using minimum water.
  3. In a food processor add the paste, salt to taste and first add about a cup of flour. Give a quick pulse to mix the flour with the paste.
  4. if the dough appears to be sticky, add more wheat flour and run on the slowest speed of the processor.
  5. Once the mix starts forming a shape, put a few drops of oil. Remove and cover the dough. Rest it for about 15 minutes.
  6. The green dough is ready.
  7. Puree the beetroot in a food processor and add little flour into the food processor to make a fine paste.
  8. Remove it from the mixer and add enough flour to make a dough. Add little oil in the end.
  9. Pull out equal sized red and green pieces dough and smoothen them to make balls.
  10. Roll green and red ball separately using wheat flour to a not so thin flatbread.
  11. Place the two flatbreads over each other and cut around the edges to give a square shape. Remove the cut edges and place them over each other. These are to be used later.
  12. Cut equal size strips of the rectangular flatbreads.
  13. Remove the strips of top colour.
  14. Put one horizontal strip of green colour on the vertical strips of pink colour. Place one end of the horizontal strip under the first vertical strip and apply water on it so that they stick.
  15. Now push the horizontal strip under the third and fifth vertical strip and stick using water. The first row gets completed this way.
  16. For the second row, stick the horizontal green strip on the first pink strip hugging the top row so that there are no gaps. Now over turn the 2nd, 4th and 6th pink strip (alternate strips).
  17. Apply water on the green strip and then turn the pink strips straight over it, leaving no gaps. This way second row is completed.
  18. Do the third row same as the first row. (alternate rows are done in similar fashion)
  19. Do the fourth row same as the second row.
  20. Complete the entire flatbread in the similar fashion. Normally all the horizontal strips do not get used. If the edges are uneven, shape them.
  21. Lift the flatbread gently and transfer to the griddle. Roast it on the hot griddle on both the sides using some oil, till it’s cooked and light brown spots are seen.

Reviews (1)  

How would you rate this recipe? Please add a star rating before submitting your review.

Submit Review
Preeti Gurung
Mar-10-2017
Preeti Gurung   Mar-10-2017

Beautiful check colours! So mesmerising!

Similar Recipes

A password link has been sent to your mail. Please check your mail.
Close
SHARE